Why Use a Car Battery Bus Bar for Better Power Distribution?
Modern vehicles demand cleaner and more dependable electrical distribution. The International Energy Agency’s Global EV Outlook 2024 reported nearly 14 million electric car sales worldwide in 2023. That growth reflects a wider engineering shift: vehicles now support more sensors, control units, inverters, and auxiliary accessories. Every additional circuit increases the need for controlled current paths, secure connections, and manageable voltage drop.
A Car Battery Bus Bar provides a compact distribution point near the battery. One strong connection can feed a starter, fuse panel, inverter, winch, or auxiliary battery system. This arrangement reduces tangled cable runs and makes inspection easier. Technicians can check terminal torque, cable condition, and fuse placement at one visible location. The U.S. Department of Energy’s vehicle technology research consistently highlights efficiency, thermal management, and reliable electrical architecture as important development priorities. A bus bar supports these priorities when its rating matches the system’s continuous and peak loads.
The detail matters. Undersized copper can heat beside a battery tray. Poor crimping can create resistance. Moisture can quietly damage exposed terminals. SAE wiring practices also stress suitable conductor sizing, insulation, routing, and protection. Therefore, a Car Battery Bus Bar is not a magic fix. It cannot repair weak cables or poor grounding. It may even concentrate risk if protection is missing. Experienced installers should calculate current demand, select a properly rated bar, and place fuses close to the battery source. The improvement is practical, but only when design discipline comes first.
What Is a Car Battery Bus Bar and How Does It Work?
Why Use a Car Battery Bus Bar for Better Power Distribution?
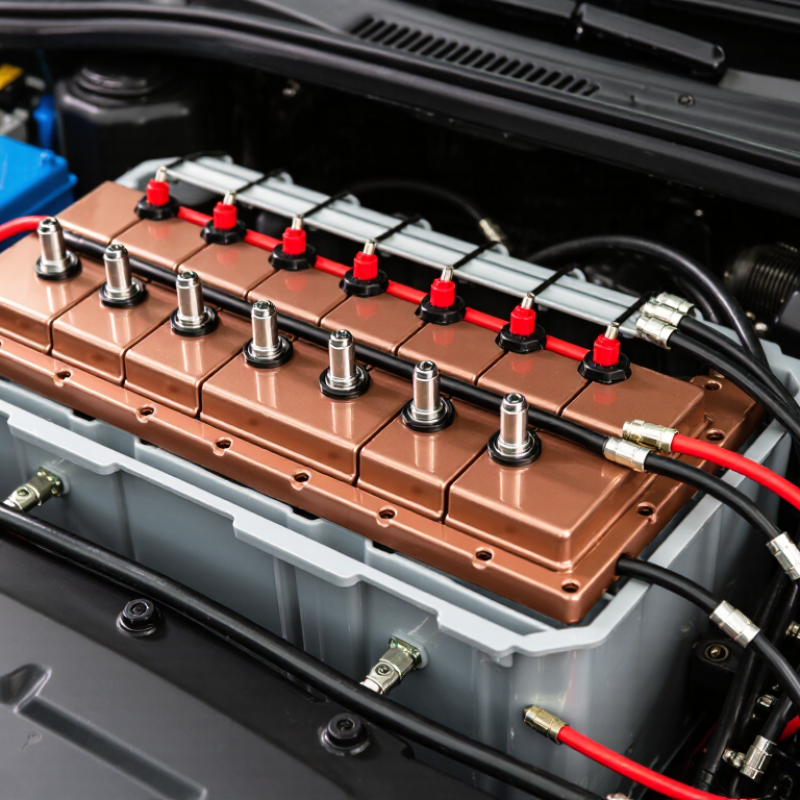
A car battery bus bar is a conductive metal strip that distributes power from one battery connection to several circuits. A main cable connects the battery to the bus bar. Smaller cables then feed lights, pumps, accessories, or control equipment. Each branch should use the correct fuse near its power source. The bar creates a cleaner current path and reduces stacked terminals on the battery post. It does not create extra battery capacity. It only organizes available power.
The negative side can use a separate bus bar, connected to the battery negative terminal or a suitable chassis ground point. When installed correctly, this arrangement makes testing easier. You can measure voltage at one central location. You can also trace a fault without removing multiple battery cables. Choose a bar rated above the expected continuous current. Check cable size, terminal tightness, insulation, and corrosion protection. A loose connection can become hot. That detail is easy to overlook.
Tips: Keep the main fuse close to the battery. Leave enough space for inspection. Label each branch cable clearly. Avoid placing exposed conductors near metal tools or moving parts. It is tempting to connect every accessory directly. That approach may work briefly, but it often creates clutter and weak contact points. A bus bar is not a substitute for proper circuit protection. Installation quality still matters most.
What Are the Main Benefits of Using a Battery Bus Bar?
A car battery bus bar creates a central point for distributing electrical power. Instead of stacking several large cables on one battery terminal, each circuit connects to a dedicated stud. This arrangement reduces cable congestion and makes the wiring easier to inspect. Less clutter matters. In practical installations, a well-positioned bus bar can also shorten cable runs, helping reduce voltage drop between the battery and equipment.
The main benefit is cleaner, more reliable power distribution. A bus bar supports multiple circuits, such as lighting, inverters, winches, or auxiliary devices, without forcing every cable onto the battery post. It can improve serviceability too. A technician can isolate one circuit, check its fuse, and tighten its terminal without disturbing unrelated connections. Good labels make fault finding faster. That detail matters.
Safety depends on proper design, not the bus bar alone. The bar must match the expected current, and every cable needs suitable overcurrent protection. Fuses should be placed close to the battery when required, while exposed conductive parts need secure insulation. Correct torque is important because a loose connection may heat under load. It is easy to overestimate the benefit of neat wiring. A poorly sized bar or weak cable can still cause failure. Reviewing the load calculation, cable length, and terminal condition remains essential, even in a tidy installation.
Why Use a Car Battery Bus Bar for Better Power Distribution?
Estimated voltage drop at 100 A in a 12 V system using a 2 m total copper current path and 35 mm² cable.
A centralized battery bus bar shortens current paths and reduces the number of high-current connections. Under the stated reference conditions, the calculated voltage drop is approximately 50% lower than with a daisy-chain distribution layout, helping improve starting performance, electrical efficiency, and voltage stability.
Reference calculation: voltage drop = current × resistance. Actual results vary with cable length, conductor size, terminal resistance, temperature, and connection quality.
How to Choose the Right Bus Bar for Your Vehicle
Choosing the right bus bar starts with the vehicle’s electrical demand, not its appearance. A compact car may need fewer connection points than an off-road vehicle with lights, pumps, and communication equipment. Check the continuous current rating, peak capacity, voltage range, and number of terminals. Do not rely on size alone. A large bar can still have weak studs or poor insulation.
Space matters. Measure the mounting area beside the battery before ordering. Select covered terminals when tools or metal parts could contact exposed connections. Copper usually offers excellent conductivity, while plated surfaces can improve corrosion resistance in damp engine bays. I also look for secure terminal spacing and clear polarity markings. Small details prevent expensive mistakes.
Cable size must match the expected load and the bus bar openings. Install suitable circuit protection close to the battery, following the vehicle manual and applicable electrical requirements. Tighten terminals to the maker’s specified torque, then check them after the first few drives. Vibration can loosen connections. It happens.
In practical installations, I prefer a bar with extra capacity rather than one operating at its limit. However, oversizing every component increases cost and may waste valuable space. I once selected a bar with generous current capacity but overlooked its mounting depth. It performed well electrically, yet installation became awkward. That mistake reinforced the need to verify dimensions, heat exposure, cable routing, and service access before installation.
How to Install and Maintain a Car Battery Bus Bar Safely
A car battery bus bar creates a fixed, organized point for distributing electrical power. Safe installation begins with the vehicle fully switched off. Remove the negative cable before touching positive connections. Keep metal tools away from both terminals. Mount the bus bar on a dry, rigid surface away from engine heat and moving parts. Use insulated covers on exposed terminals. Select cable sizes and terminal ratings according to the electrical load, not appearance.
Check the wiring diagram before connecting each circuit. Place an appropriately rated fuse close to the battery’s positive terminal. Do not guess. Crimp cable lugs with a suitable tool, then inspect the crimp for movement or exposed strands. Torque each fastener to the component manufacturer’s specification. Loose connections create heat, voltage loss, and possible damage. After reconnecting the battery, test each circuit separately with a multimeter. Confirm that no cable becomes warm during normal operation.
Maintenance should include a monthly visual inspection, especially in dusty or damp vehicles. Look for green corrosion, cracked insulation, loose nuts, and darkened metal around terminals. Clean corrosion only after disconnecting the battery, and keep moisture away from open connections. Check fuse holders and cable supports after long trips or heavy vibration. It is easy to overlook a slightly loose fastener. That small mistake can grow quietly. I would also record voltage readings and inspection dates, although many owners skip this simple habit. Replace damaged cables immediately, rather than wrapping them temporarily and forgetting them.