How to Choose the Best Curing Oven for Your Needs?
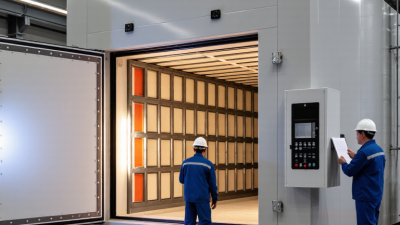
Choosing the right curing oven starts with the material, not the catalog. A coating on a small metal bracket may need a different temperature profile from a thick composite panel. Part size, production volume, cure chemistry, and loading pattern all shape the decision. A compact batch oven can suit varied work, while a conveyor system may better support steady output. Neither is automatically the better choice.
One practical rule captures the trade-off: “Choose an oven around the cure process, not around its headline temperature.” This is original editorial wording, not a quotation from a named expert; no source was provided to verify an expert’s name or exact words. A reliable selection also considers temperature uniformity, airflow, controls, maintenance access, and available floor space. Ask suppliers for test data using representative parts, rather than relying only on an empty-chamber reading. Small details matter. A crowded rack can block airflow, and a door that opens into a busy aisle can slow daily work.
This guide will help compare oven types, capacity, heating methods, and control features. It will also explain what to ask during supplier discussions and how to assess operating costs. The answer may not be perfectly neat: real production lines change, and estimates can miss awkward part shapes or uneven loading. Treat the choice as a process decision, then verify it with a trial. The best curing oven is the one that delivers repeatable results for your actual workload.
Define the Cure Requirement: Many Powder Coatings Need 160–200°C for 10–20 Minutes
A curing oven should match the coating’s cure requirement, not just its advertised air temperature. Many powder coatings specify about 160–200°C for 10–20 minutes, but the schedule usually applies to the part’s metal temperature. Check the coating’s technical data sheet before choosing equipment. The Powder Coating Institute’s finishing guidance likewise stresses following the coating supplier’s cure schedule. Small detail, big effect.
The timer should start when the workpiece reaches the specified temperature, not when it enters the oven. A thick steel bracket may take much longer to heat than a thin panel. ASTM D3451-21 provides guidance for testing coating powders and finished coatings, while ISO 8130-6:2019 describes a method for measuring powder gel time. Neither replaces the product-specific cure schedule. Use a temperature probe attached to a representative part, then verify the oven’s temperature uniformity under a realistic load.
Consider the slowest-heating part in your usual batch. Oven size, airflow, and loading density can all affect whether every surface receives enough heat. An empty-oven reading can be reassuring—and misleading. I would test a sample load before committing to a cycle, then record the part-temperature curve. It takes extra time. But that check can reveal a cure window your control panel alone cannot confirm.
Choose an Oven Type: Compare Batch, Conveyor, and Infrared Systems
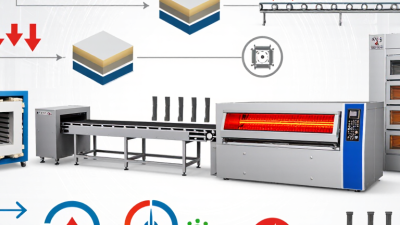
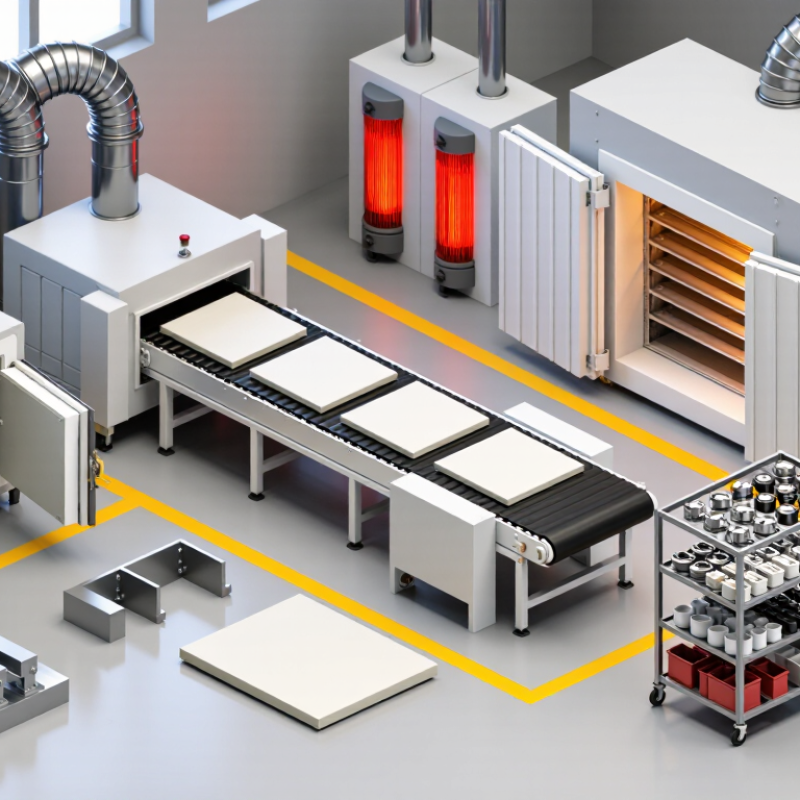
Batch ovens suit varied products, short runs, and frequent recipe changes. Operators can load racks by hand, set a profile, and inspect parts between cycles. The trade-off is idle time: one large door opening can also disturb chamber temperature. Conveyor ovens fit steady, high-volume production. Parts move at a controlled speed through heated zones, making dwell time easier to repeat. But a conveyor running below capacity wastes energy and floor space. Infrared systems transfer heat quickly to exposed surfaces. They can work well for thin coatings or parts with clear line-of-sight, but shadowed areas may cure unevenly. There is no perfect winner.
The U.S. Department of Energy’s Improving Process Heating System Performance: A Sourcebook for Industry estimates that process heating accounts for about 36% of manufacturing energy use. That figure covers more than curing ovens, but it shows why heat loss and operating schedules matter. Compare actual production data: parts per hour, color or material changes, cure-window tolerance, and energy used per finished part. Ask suppliers to run representative parts, not ideal samples. A warm panel reading is not proof of a cured coating; verify the result with the applicable test method. Fit matters. Infrared may shorten exposure, yet uneven geometry can complicate control. Batch flexibility can be valuable, though door openings and operator timing make results less consistent. Cite the DOE figure as context, then validate performance with a logged trial at your own line.
Size the Oven: Match Load Dimensions, Dwell Time, and Parts per Hour
Start with the largest actual load, including racks, trays, and fixtures. Measure its length, width, and height, then check the oven’s usable interior dimensions. Leave room for airflow around parts; a tightly packed load can heat unevenly. Confirm clearance and loading access with the oven supplier. A tape measure beats a guess.
Next, size the oven around the full production cycle, not dwell time alone. Dwell begins when parts reach the required temperature, which may take longer for thick or heavy items. Add heat-up, unloading, reloading, and temperature recovery time. For example, 24 parts in a 40-minute batch equals 36 parts per hour on paper. Real output will be lower when handling delays or load variation appear. The spreadsheet may look neat. The shop floor rarely does. For a conveyor oven, include part spacing and belt speed in the rate calculation. Use process requirements and a representative trial load to check your assumptions before finalizing capacity.
| How to Choose the Best Curing Oven for Your Needs? — Size the Oven: Match Load Dimensions, Dwell Time, and Parts per Hour |
| Example Load |
Part Envelope (L × W × H) |
Estimated Usable Oven Interior |
Parts per Load |
Cure Dwell Time |
Estimated Total Cycle Time |
Estimated Throughput |
| Small components |
12 × 8 × 4 in
(305 × 203 × 102 mm) |
36 × 36 × 36 in
(914 × 914 × 914 mm) |
8 |
30 min |
45 min
(30 min dwell + 15 min handling and recovery allowance) |
About 10.7 parts/hour |
| Medium assemblies |
18 × 12 × 6 in
(457 × 305 × 152 mm) |
48 × 48 × 48 in
(1,219 × 1,219 × 1,219 mm) |
12 |
45 min |
60 min
(45 min dwell + 15 min handling and recovery allowance) |
About 12 parts/hour |
| Large, shallow panels |
30 × 24 × 3 in
(762 × 610 × 76 mm) |
72 × 48 × 36 in
(1,829 × 1,219 × 914 mm) |
6 |
40 min |
60 min
(40 min dwell + 20 min handling and recovery allowance) |
About 6 parts/hour |
| Tall assemblies |
24 × 18 × 30 in
(610 × 457 × 762 mm) |
48 × 48 × 72 in
(1,219 × 1,219 × 1,829 mm) |
4 |
60 min |
80 min
(60 min dwell + 20 min handling and recovery allowance) |
About 3 parts/hour |
| High-volume small parts |
6 × 4 × 2 in
(152 × 102 × 51 mm) |
48 × 36 × 36 in
(1,219 × 914 × 914 mm) |
24 |
25 min |
40 min
(25 min dwell + 15 min handling and recovery allowance) |
About 36 parts/hour |
|
Planning note: Throughput is estimated as parts per load × 60 ÷ total cycle time. Allow space for racks, airflow, part spacing, and loading access; confirm the required cure schedule and actual oven capacity with the process specification and a representative load test.
|
Check Temperature Uniformity: Measure Heat Across the Loaded Work Zone
How to Choose the Best Curing Oven for Your Needs?
Check Temperature Uniformity: Measure Heat Across the Loaded Work Zone
Temperature uniformity means checking whether heat stays consistent throughout the area your parts actually occupy. An empty oven can look stable while a loaded work zone has cool corners or warm spots near the heating elements. Small differences matter. Place calibrated temperature probes at several points, including the center, corners, and levels where parts will sit. Keep probes clear of oven walls and avoid letting them touch metal racks. Record readings after the oven reaches its set temperature and stabilizes.
Test with a representative load, not just an empty chamber. The size, spacing, and material of your parts can change airflow and heat transfer. Leave enough room between items for air to circulate, and repeat the test if your normal load varies. A single run may not reveal a pattern; that is easy to overlook. Compare the hottest and coolest readings with the curing range specified for your material, rather than relying only on the oven’s display. If readings fall outside that range, adjust loading, airflow, or equipment settings, then measure again. Probe placement and sensor accuracy can also affect results, so document both when comparing tests.
Compare Energy and Safety: Assess Efficiency and NFPA 86 Compliance
When comparing curing ovens, ask for measured energy per batch, not just the heater’s rated power. The U.S. Department of Energy’s 2018 Manufacturing Energy Footprint analysis attributes about 36% of manufacturing energy use to process heating. That makes idle losses and poor loading worth checking. Small details matter. Record warm-up time, cure time, batch size, and standby consumption under your actual production conditions.
Safety belongs in the same comparison. NFPA 86, 2023 edition, addresses industrial ovens and furnaces, including safeguards for fuel-fired equipment, ventilation, operating controls, and fire protection. Confirm which edition your local authority has adopted, then review the oven’s documented safety features against your process and installation. For a fuel-fired unit, ask how purge sequences and flame-failure responses are verified. For any unit, check alarms, access doors, and maintenance procedures. That is measurable.
I would not treat a glossy efficiency percentage as proof; it can hide a poor load match. Request test conditions and temperature-uniformity data, then compare them with your parts, racks, and cure schedule. A lightly loaded oven may use nearly as much energy as a full one. Small caveat: one production week may not represent seasonal demand. Keep the measurement method consistent, and include safety checks in routine maintenance records.